Getting started
This section will guide you through the steps to setup the release workflow in your Arduino asset repository.
Prerequisites
Before you start, make sure you satisfy the following prerequisites:
Your Arduino asset (library or core) is hosted in a GitHub repository.
GitHub Actions is enabled in your repository. Check the GitHub docs to learn how to enable it.
You have appropriate permissions to create releases in your repository.
If your asset is an Arduino core, ensure it’s properly configured for packaging with the arduino-packager.py tool.
Setting up the reusable workflow
In your locally cloned repository, follow these steps:
Create a new branch, for example
devops/release-workflow.Note
This is not strictly necessary, but recommended to avoid pushing changes directly to the main branch.
Create a new file in the
.github/workflowsdirectory, for examplerelease.yml.Add the following content to the file:
name: Release

on:
  push:
    tags:
      - '[0-9]+.[0-9]+.[0-9]+**'
  workflow_dispatch:
    inputs:
      version:
        description: 'Release version'
        required: true
        default: ''
        type: choice
        options:
          - patch
          - minor
          - major

jobs:
  arduino-devops:
    uses: Infineon/arduino-devops/.github/workflows/release.yml@latest
    with:
      version: ${{ inputs.version }}
    secrets: inherit
Important
Notice the
@latestat the end of theusesline. This will use the latest version of the reusable workflow. This is particularly useful to automatically get the latest updates in the reusable workflow. Keep in mind that this may introduce breaking changes in case of major version updates. You can also specify a specific version, for example@0.4.0, or a branch, for example@main.Commit your changes and push the branch to the remote.
Additional workflow options
The GitHub Action reusable workflow provides some additional options often used in the release process:
setup-scriptAdd a setup script that will be executed before building the release asset. For example:
jobs:
  compile-examples:
    uses: Infineon/arduino-devops/.github/workflows/compile-examples.yml@latest
    with:
      setup-script: bash scripts/before-core-build-setup.sh
release-ssh-keyThis is used to provide a secret SSH key from the repository secrets to the workflow.
For example:
jobs:
  arduino-devops:
    uses: Infineon/arduino-devops/.github/workflows/release.yml@latest
    with:
      version: ${{ inputs.version }}
    secrets:
      release-ssh-key: ${{ secrets.release_wflow_key }}
This is required for Arduino libraries when using protection rules that prevent direct commit to the default branch.
As the workflow creates new commits and pushes them to the remote repository, the new commits will be rejected.
To avoid this, you can use the SSH key to push the changes to the remote repository.
Follow the steps to allow GitHub Actions to push changes directly to the default (protected) branch:
Add a new deploy key to your repository with write access. This is available in the repository settings under “Deploy keys”.
Add the private key to your repository secrets with the name
release_wflow_key.If you have any protection rules that prevent direct commits to the default branch, enable the bypass option for deploy keys.
More information about this approach in this GitHub discussion.
Creating a release
Once the workflow is set up, you can create releases in different ways:
Release via GitHub actions
Navigate to the
Actionstab of your repository in GitHub.Select the
Releaseworkflow from the list.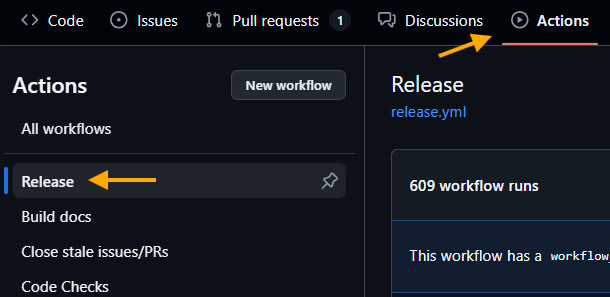
Click
Run workflowand select the default branch (usuallymainormaster) and the version increment: major, minor, or patch.
The workflow will automatically:
Validate the version format
Generate a changelog
Create a GitHub release
Upload release assets
Once the workflow completes, you will see all the release steps passing, and the new release will be available in the
Releasessection of your repository.
Release via GitHub release section
Navigate to the
Releasessection of your repository.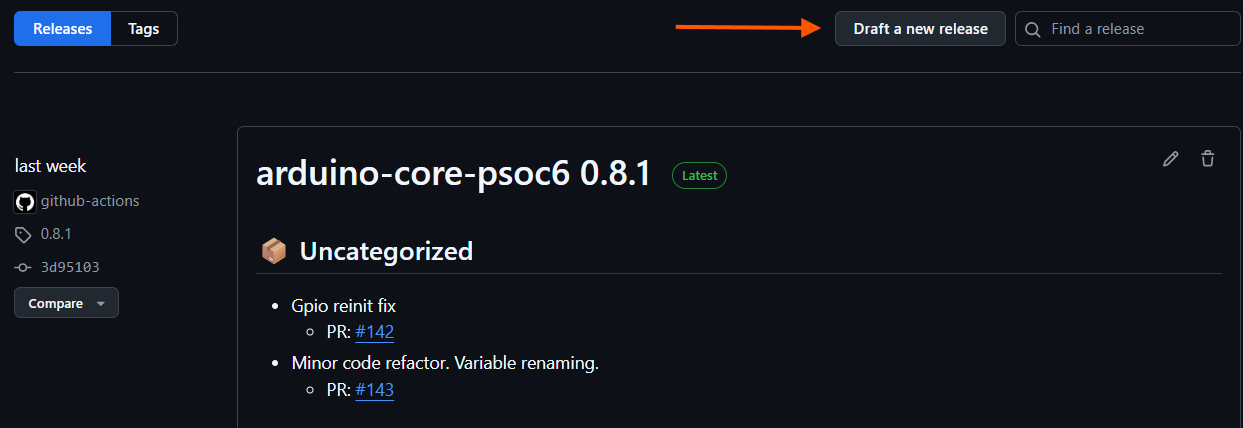
Click on the
Draft a new releasebutton.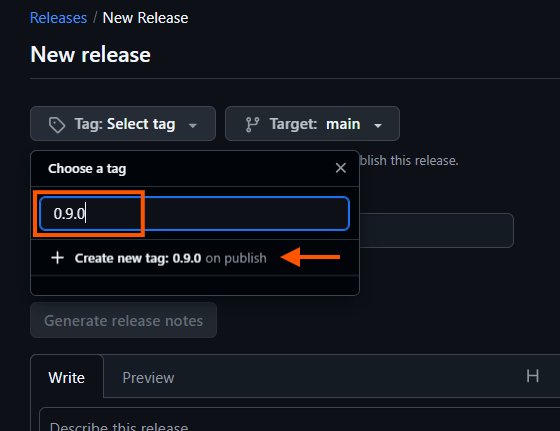
Fill in the release tag (e.g.,
0.9.0), and click onCreate new tag: 0.9.0.Warning
You are going to set the tag manually. It should be a valid semantic version (semver) format, with a valid increment.
This will trigger the release workflow, and it will automatically:
Validate the version format
Generate a changelog
Create a GitHub release
Upload release assets
Once the workflow completes, the new release will be updated with the corresponding title, changelog and assets.
Release from local push
In your local repository, use the arduino-script.py to create a new release. Assuming that you are in the root path of your repository, and that the script is located in the arduino-devops directory:
python arduino-devops/arduino-script.py new <version>
This will automatically modify the required files, create a new tag, and push the changes to the remote repository.
The release workflow will be triggered, verifying the version and creating the release.
Check the release section of your repository to see the new release.
Warning
In case of an Arduino library, make sure that you have the necessary permissions to push modifications directly to the default (usually
mainormaster) branch of the repository. The script will not only create a tag, but also update the library.properties file with the new version and push the changes to the remote repository. The remote will reject the push if you do not have the right permissions.